Ever decided to bake from your own blog? I sure have. Result? Frustration! Why, oh why, did I not list the amount of each ingredient in the step-by-step instructions, as well as in the list at the beginning. WHY?! Because I wanted people to spend all their time scrolling up and down???? *ahem* Apologies all round. I am going to fix all previous posts as soon as this one is published! Klepto’s honour 😀
Rant done. Onto the matter at hand: OMG DE-FREAKING-LICIOUS CUPCAKES

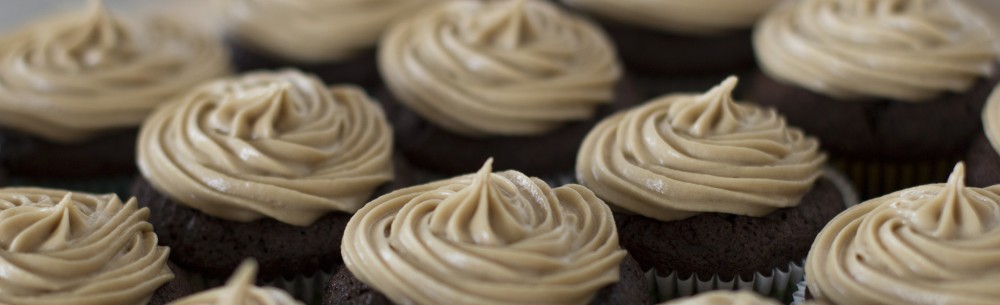
What was that a photo of? Oh, only THE BEST caramel frosting I have had in my life, lovingly settled in a swirly fashion atop those indescribably delightful chocolate cupcakes I wrote about in my VERY FIRST BLOG POST.
As such, I won’t be reposting the chocolate cupcake process. Refer back to my previous chocolate cupcake recipe, but cut the cook time to 16 minutes if you are making mini cupcakes like I decided to do. I also put a secret treat in the centre of these mini ones. So, once you’ve mixed up your batter, jump back here before you start spooning them into your muffin tray!
MMmmm. I’m having flavour flashbacks. They were just so light and so fluffy and definitely delectable enough to lure Hansel and Gretel right into my oven.
Caramel Frosting Ingredients:
114 g salted butter
220 g dark brown sugar
80 ml milk
360 g confectioner’s sugar
an extra few tablespoons of milk
With one batch of frosting, I had enough to decorate 80 mini cupcakes!
Melt the butter (114 g) in a small saucepan over low heat. Add brown sugar (220 g) and milk (80 ml). Stir continuously over medium heat until the sugar has dissolved then allow to bubble for another 2-3 minutes. Remove from heat.

Pour your caramel into a large bowl and allow to cool. Using an electrical mixer, beat in the confectioners sugar (360 g total) in three equal parts. Before turning the hand mixer on, I stirred in the icing sugar a bit, then covered both the bowl and the mixer with a towel for beating. This, combined with turning on my extractor fan, helped me avoid the light coating of icing sugar that so often covers my kitchen and my lungs.

Once your confectioner’s sugar is all beat in, tightly cover the frosting with cling film until you are ready to decorate, as contact with air quickly dries it out.
Just before you are ready to use it, beat in some milk, one tablespoon at a time, until it is soft enough to pipe but still firm enough to hold its shape. (I used 3 tbsp, but this will vary.)
Now back to CUPCAKES!
You’ve just finished mixing up your cupcake batter and are ready to spoon it into adorable mini muffin trays. But first, these little scrumpties (I tried to make scrumptious into a noun… Def: scrumptious and adorable baked goods) were filled with a tiny secret: Cadbury Nibbles hidden in the centre!
One batch of batter makes 40 mini cupcakes, so cut 40 Nibbles in half.

The first method I tried just led to sunken Nibbles at the bottom of my cupcakes, but as I found out in my second batch (I was making 80 cupcakes and one batch is only 40, hence the second. Sadly, by then, I wasn’t being as vigilant with my photo-documentation) the best thing to do is to put two teaspoons of batter into each cup, then press the two half Nibbles together, side by side, and push them gently into the top of the batter. You want to be able to see the tops of the Nibbles.
The following picture doesn’t showcase the peeking out Nibbles, but it does show how much room the cupcakes need to expand. These little babies rise, so give them a good 1/3 of growing room!

Pop them in the oven (160 C fan) for 16 minutes and the Nibbles-ified cupcakes will look like:

Transfer the cupcakes to a rack and leave them until they are completely cool.
Now, as mentioned before, make your icing soft enough to pipe, transfer it to a piping bag, select your preferred nib, and get piping!


